Ever dreamed of crafting game worlds that feel endless, where every playthrough offers a fresh challenge? If you're building games with Godot Engine, the idea of procedurally generated dungeons isn't just a fantasy – it's a powerful tool to inject infinite replayability and surprise into your creations. This comprehensive guide serves as your Introduction to Godot Dungeon Generators, revealing how to transform complex algorithms into captivating, ever-changing levels.
At a glance, here’s what we’ll dive into:
- Why procedural generation rocks: Endless replayability, reduced manual design, and dynamic challenge.
- The core ingredients: Understanding rooms, corridors, and tiles as building blocks.
- Popular algorithms unpacked: From "random rooms, then connect" to cellular automata.
- Building your own: A step-by-step guide to conceptualizing and coding a basic generator in Godot.
- Beyond the basics: Adding flair, managing complexity, and avoiding common pitfalls.
- Tools and addons: When to leverage existing solutions to accelerate your development.
Why Go Procedural? The Magic of Infinite Dungeons
Imagine a player starting your game. Each time they venture into a dungeon, the layout is completely different – new paths, unexpected room configurations, fresh challenges. That's the allure of procedural generation: it allows you to create vast, unique levels without hand-designing every single detail. For game developers, especially those working solo or in small teams, this isn't just a neat trick; it's a game-changer for content creation and player engagement.
The beauty of procedural dungeons in Godot lies in their ability to offer:
- Unparalleled Replayability: Players can return to your game countless times, always encountering a fresh environment. This keeps the experience exciting and extends the longevity of your game.
- Reduced Development Overhead: Instead of spending hundreds of hours meticulously crafting individual levels, you design the rules for level creation. The generator does the heavy lifting, freeing you to focus on gameplay mechanics, art, and storytelling.
- Dynamic Challenge: With varied layouts, players can't simply memorize a path. They must adapt, strategize, and truly engage with the game's core mechanics in an ever-changing environment.
- Surprise and Discovery: Both for the player and, sometimes, for you, the developer! Procedural systems can sometimes yield unexpected and delightful layouts you might not have conceived manually.
While the concept might sound intimidating, breaking it down makes it entirely approachable. Think of it less as pure magic and more as an intelligent assembly line, constructing new experiences based on your blueprints.
Understanding the Dungeon Blueprint: Core Concepts
Before we dive into the nitty-gritty of algorithms and Godot code, let's establish the fundamental elements that make up most procedural dungeons. Think of these as the LEGO bricks of your infinite worlds.
- Rooms: These are the primary points of interest in your dungeon. They can vary in size, shape, and purpose – from simple squares to intricate multi-tile chambers, treasure rooms, combat arenas, or even quest hubs. A generator often starts by placing rooms first, then connecting them.
- Corridors (or Paths): These are the connections between rooms, guiding the player through the dungeon. They can be straight lines, winding passages, or a more complex network. How these paths are generated is crucial to the dungeon's flow and navigability.
- Tiles: In a grid-based dungeon (which many are), tiles are the smallest units of space. A tile can be a floor, a wall, an obstacle, or a special feature. Your generator will typically operate on a grid, assigning different tile types to define the dungeon's structure.
- Walls: Essential for defining boundaries, separating rooms, and channeling movement. Walls are typically generated after rooms and corridors are laid out, filling in the empty spaces that aren't designated as traversable. As noted by one developer's project, the process often involves laying out rooms, creating paths, "then generates the necessary walls."
In Godot, these elements translate beautifully into scenes, nodes, and resources. A "room" might be its own.tscnfile, a "tile" could be part of aTileMapnode, and the generator itself would be a script orchestrating their placement and interaction.
Unpacking Common Dungeon Generation Algorithms
While there are countless ways to generate a dungeon, several core algorithmic approaches form the bedrock for most procedural systems. Understanding these gives you a strong foundation for choosing or designing one that fits your game's needs.
The "Random Rooms, Then Connect" Approach (TinyKeep-esque)
This is a widely adopted and often intuitive method, famously popularized by games like TinyKeep. It's an excellent starting point for many developers. Here's the basic flow:
- Place Random Rooms: The generator scatters a desired number of rooms (random sizes, random positions) across a grid. These rooms often overlap initially.
- Resolve Overlaps (Optional but Recommended): A common refinement is to "push" overlapping rooms apart until they no longer intersect. This creates distinct spaces.
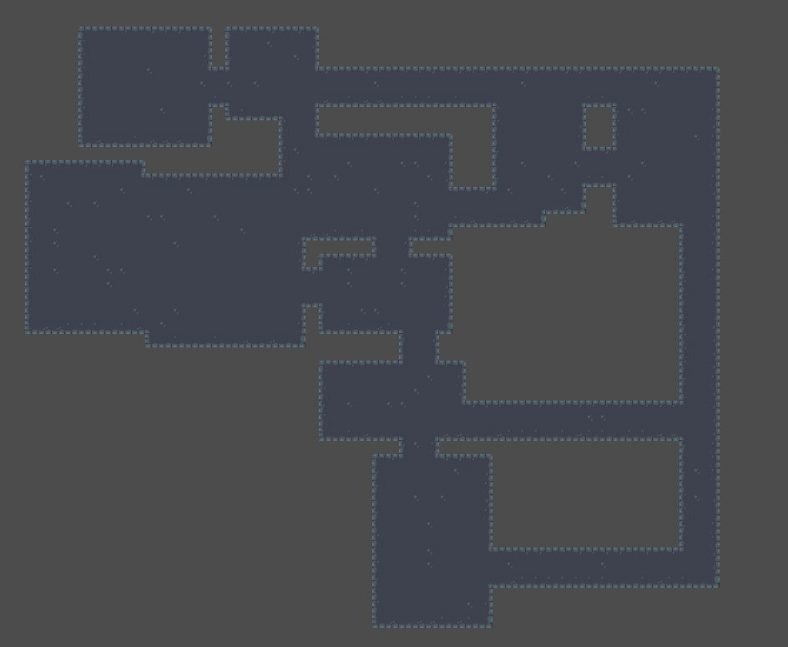
- Select "Main" Rooms: From this initial set, a subset of rooms is often designated as "main" or "critical" rooms. These might be start/end points, key objectives, or simply rooms that must be connected. One Godot developer's project on the official forums illustrates this, where the algorithm "initially lays out random rooms, chooses main rooms in red, creates paths between them in blue, then generates the necessary walls."
- Connect Main Rooms: Paths (corridors) are then generated to link these main rooms. This often involves techniques like Minimum Spanning Trees (MST) or Delaunay Triangulation to ensure all main rooms are connected efficiently.
- Connect Remaining Rooms: Finally, any non-main rooms that are still isolated are connected to the main network.
- Carve Paths: Once connections are established, the grid cells along these paths are "carved out" as floor tiles.
- Generate Walls: All remaining non-floor cells adjacent to floor cells are then turned into walls. This ensures a clean, enclosed dungeon.
This method offers a good balance of randomness and structural control, making it versatile for various game genres.
Cellular Automata
If you've ever seen those organic, cave-like structures in games, you've likely encountered cellular automata. This method starts with a grid of randomly filled "alive" or "dead" cells (representing walls or floors). Then, using a set of simple rules (e.g., "a dead cell with 5 or more alive neighbors becomes alive," "an alive cell with fewer than 2 alive neighbors dies"), the grid iteratively evolves.
After several "generations," the patterns converge into natural-looking caves or labyrinthine structures. Cleanup steps, like removing small isolated "islands" of wall or floor, often follow to refine the result. It's less about rooms and corridors and more about emergent, natural patterns.
Delaunay Triangulation and Voronoi Diagrams
These geometric concepts are powerful for ensuring connectivity and creating unique layouts.
- Delaunay Triangulation: If you have a set of points (e.g., room centers), Delaunay triangulation connects these points with triangles such that no point lies inside the circumcircle of any triangle. This creates a network that's perfect for laying down initial paths between rooms.
- Voronoi Diagrams: These partition a plane into regions based on proximity to a set of "seed" points. Each region consists of all points closer to one seed than to any other. In dungeon generation, this can be used to define irregular room shapes or biome boundaries.
Combining these (e.g., using Delaunay to connect room centers, then creating paths along the triangle edges) can lead to highly varied and interesting dungeon layouts.
Building Your First Godot Dungeon Generator: A Step-by-Step Guide
Ready to get your hands dirty? Let's walk through the conceptual steps of building a basic "random rooms, then connect" generator in Godot. While we won't write every line of code here, this framework will equip you to start scripting your own.
Step 1: Planning Your Dungeon's Personality
Before you write any code, decide what kind of dungeon you want.
- Overall Size: How big is your dungeon grid (e.g., 64x64, 128x128)? This influences performance and layout.
- Room Count and Size: How many rooms do you want? What's the typical min/max width/height for a room?
- Connectivity: Do you want a linear path, a sprawling maze, or something in between?
- Density: How much of the dungeon should be traversable vs. filled with walls?
These parameters will become the variables you tweak in your Godot script. Remember the Max n Jackson project that allowed users to "see the different settings used to tweak the output" – your generator should have similar adjustable parameters.
Step 2: Defining Your Building Blocks (Rooms & Tiles)
In Godot, you'll want to leverage its scene system.
- Basic Room Scene: Create a simple
Room.tscnscene. This might just be aNode2Dwith aRectangleShape2D(for collision detection) and maybe aSprite2DorColorRectto visualize its bounds. For a 3D game, this would involveMeshInstance3Dnodes, though a 2D representation is often easier for the generation logic, as one developer noted: "a 2D viewer would very easy to implement, probably easier." - TileMap: For the final dungeon visualization, a
TileMapnode is invaluable. Design aTileSetwith different tile types: floor, wall, door, possibly different floor textures. This allows you to efficiently render large grids.
Step 3: Implementing the Core Algorithm (GDScript Logic)
Create a new script, say DungeonGenerator.gd, and attach it to an empty Node2D (for 2D) or Node3D (for 3D) in your main scene.
- Grid Initialization: Start by filling your entire grid with "wall" tiles (or a placeholder indicating empty space).
gdscript
extends Node2D # Or Node3D for 3D
@export var dungeon_width: int = 64
@export var dungeon_height: int = 64
@export var max_rooms: int = 20
@export var min_room_size: int = 5
@export var max_room_size: int = 15
var grid: Array[Array]
var rooms: Array[Rect2] # Store room rectangles
func _ready():
generate_dungeon()
func generate_dungeon():
grid = []
for x in range(dungeon_width):
grid.append([])
for y in range(dungeon_height):
grid[x].append(1) # 1 for wall, 0 for floor
rooms = []
_create_random_rooms()
_connect_rooms()
_carve_walls()
_spawn_visuals() _create_random_rooms():
- Loop
max_roomstimes. - Generate a random
Rect2(x, y, width, height) within yourdungeon_width/heightbounds, respectingmin_room_size/max_room_size. - Add this
Rect2to yourroomsarray. - Optional: Implement collision detection to prevent rooms from overlapping too much or to push them apart.
_connect_rooms(): This is where you implement your chosen connection algorithm. For the "random rooms, then connect" method, you might:
- Pick a starting room.
- Find the nearest unconnected room.
- Draw a path (e.g., a "L-shaped" corridor) between their centers, marking grid cells as "floor."
- Repeat until all rooms are connected. A more robust approach might use graph algorithms like a Minimum Spanning Tree (MST) on the room centers, then trace corridors along the edges of the MST.
Step 4: Connecting the Dots (Corridors & Paths)
The _connect_rooms() function is where your dungeon's flow truly takes shape. A common, simple way to connect two rooms, room_A and room_B, is to create an "L-shaped" corridor:
- Start at the center of
room_A. - Move horizontally until you align with the X-coordinate of
room_B. - Then move vertically until you reach the Y-coordinate of
room_B. - As you move, mark all grid cells along this path as 'floor' (e.g.,
grid[x][y] = 0).
This basic method can be expanded:
- Randomization: Introduce a 50/50 chance to move vertically first, then horizontally, for varied corridor shapes.
- Pathfinding (A*): For more complex connections, especially around existing obstacles or other rooms, implementing a simple A* pathfinding algorithm can create more organic and intelligent routes.
Step 5: Visualizing and Populating Your Creation
Once your grid array is populated with 0 (floor) and 1 (wall) values:
_carve_walls(): Iterate through yourgrid. If a cell is1(wall) and it's adjacent to a0(floor) cell, mark it as a final wall tile. Otherwise, it might be empty space outside the dungeon, or a solid block of rock._spawn_visuals(): This is where Godot'sTileMapshines.
gdscript
func _spawn_visuals():
var tile_map = get_node("TileMap") # Assuming you have a TileMap node
tile_map.clear()
for x in range(dungeon_width):
for y in range(dungeon_height):
if grid[x][y] == 0: # Floor
tile_map.set_cell(0, Vector2i(x, y), 0, Vector2i(0, 0)) # Layer 0, floor tile
elif grid[x][y] == 1: # Wall
tile_map.set_cell(0, Vector2i(x, y), 1, Vector2i(0, 0)) # Layer 0, wall tile
You'll need to set up your TileSet's source IDs and atlas coordinates
You'd also instance your Room.tscn scenes for each Rect2 in your rooms array, perhaps as children of a dedicated container node. This could also be the stage where you add decorative elements, spawn enemies, or place interactive objects within rooms.
Beyond the Basics: Enhancing Your Generators
A basic generator is a great start, but the real fun begins when you add layers of complexity and polish.
Room Variety and Function
Don't let all your rooms look the same!
- Templates: Create different
Room_Type_A.tscn,Room_Type_B.tscnscenes (e.g., a "treasure room," a "trap room," a "monster den"). Randomly select which template to use when placing rooms. - Dynamic Interiors: Even with a single template, use code to randomly place internal obstacles, furniture, or props within a room's bounds.
- Room Purpose: Assign special roles (e.g., start room, boss room, exit room) and ensure they are placed strategically and connected appropriately.
Managing Transitions and Camera Control
For a seamless player experience, how you move between dungeon segments matters. The Kulugary project, an "implementation of procedural generation for Godot 4.x," specifically highlights "floorplan generation, room management and camera transitions between rooms."
- Door Placement: Automatically place doors at corridor intersections with rooms.
- Camera Zooms/Pans: When a player enters a new room, you could trigger a camera pan or zoom to highlight the new area, making the transition feel more impactful.
- Mini-Maps: A dynamically generated mini-map based on your
gridarray is almost essential for player navigation in complex procedural dungeons.
Balancing Control and Randomness
Pure randomness can lead to unplayable or uninteresting dungeons. The key is finding the right balance.
- Seed Control: Implement a seed system. If you generate your dungeon using a specific number (the seed), you can regenerate the exact same dungeon again. This is invaluable for debugging, sharing specific layouts, or even having "daily challenge" dungeons.
- Rule Sets: Define rules that must be met (e.g., "always at least one path to the boss room," "no room should be too small or too large").
- Post-Processing: After initial generation, run validation checks. Are there any unreachable areas? Are corridors too narrow? Automatically fix or regenerate problematic sections.
Navigating the Pitfalls: Common Challenges & Solutions
Developing dungeon generators isn't without its quirks. Here are some common hurdles and how to overcome them:
- "Spaghetti" Corridors: Uncontrolled pathfinding can create overly long, winding, or self-intersecting corridors that feel unnatural.
- Solution: Prioritize shorter paths (e.g., using A* with distance heuristics), introduce constraints on turns, or use simpler direct connections like the L-shape.
- Unreachable Areas: A bug in your connection logic can lead to isolated rooms or sections of the dungeon.
- Solution: Implement connectivity checks after generation (e.g., a flood-fill algorithm from the start point). If isolated areas are found, either connect them or remove them.
- Performance Hits: Large grids or complex instancing can slow down generation, especially on lower-end hardware. Remember the Max n Jackson generator "typically generates within a frame so I added lots of small timeouts to help visualize the steps" – implying performance can be a concern.
- Solution: Optimize your algorithms, use Godot's
call_deferred()for heavy operations, or implement generation over multiple frames.TileMapnodes are highly optimized for rendering large grids.
- Aesthetic Blandness: Even perfectly functional procedural dungeons can feel repetitive or dull if they lack visual variety.
- Solution: Introduce more tile variations, different room templates, prop spawning, environmental hazards, and randomized lighting. Don't forget to leverage Godot's particle systems and shaders!
- Debugging Nightmares: Tracing issues in a randomly generated environment can be tough.
- Solution: Implement strong visualization. During generation, use
ColorRectnodes or debug lines to show rooms, potential paths, and wall boundaries. Use a fixed seed during development to reproduce bugs easily. Print grid states to the console at key stages.
Choosing Your Path: Starter Kits vs. Building from Scratch
When embarking on your procedural generation journey in Godot, you'll face a fork in the road: should you build everything from the ground up, or use a pre-made asset?
Building from scratch offers maximum flexibility and a deep understanding of the underlying mechanics. It's an excellent learning experience and allows you to tailor every aspect to your game's unique vision. If you have specific, custom requirements, this is often the best route.
However, if your goal is to get a functional dungeon into your game quickly and perhaps learn by dissecting existing code, a starter kit or addon can be a lifesaver. It’s important to note, though, that not all ready-made solutions are "starter kits" in the sense of being full-featured game templates. As the Kulugary project description states, it is "intended as a prototype / skeleton for further development, and it is not intended as a starter kit for roguelike / roguelite games." This distinction is crucial: a "prototype/skeleton" might provide core generation logic but leave all game-specific implementation (player, enemies, UI) up to you.
Tools and Helpers: When to Use an Addon
Godot's open-source nature means a vibrant community has created many useful tools. For dungeon generation, this often translates into plugins and addons that can dramatically accelerate your development.
When should you consider an addon?
- Time Constraints: If you're on a tight deadline and generating dungeons isn't your core gameplay innovation, an addon can save weeks of development.
- Learning Aid: Examining a well-structured addon can teach you best practices and different approaches to procedural generation.
- Complex Algorithms: If you need a sophisticated algorithm (e.g., 3D voxel-based dungeons) that's beyond your current expertise, an addon might provide a robust solution.
- Specific Features: Some addons specialize in niche areas like seamless room transitions, specific tile types, or editor integration.
One such invaluable resource is the Godot dungeon generator addon available from various community sources. These addons often provide a framework for defining room templates, managing connectivity, and even handling dynamic object placement, allowing you to focus on the aesthetic design and gameplay elements rather than the low-level generation logic. Always check an addon's compatibility with your Godot version (e.g., Godot 3.x vs. 4.x) and its documentation before integrating it into your project.
Your Next Quest: Turning Theory into Playable Worlds
You've explored the foundations of procedural dungeon generation, from the core concepts of rooms and corridors to the nuances of various algorithms. You now have a conceptual blueprint for bringing infinite dungeons to life in Godot.
The real adventure begins when you start experimenting. Don't be afraid to try different algorithms, combine techniques, and break the "rules" to see what emerges. Start with a simple 2D generator, get it working, and then gradually add complexity – more varied rooms, smarter pathfinding, interactive elements, and dynamic lighting.
Remember, the goal isn't just to generate a dungeon; it's to generate a fun and engaging experience for your players. So grab your keyboard, fire up Godot, and start crafting worlds that unfold anew with every play!